Traces: List View
The List view provides a structured, table-like layout for managing Traces. It is ideal for users who prefer working with detailed data in rows and columns. This view allows for easy sorting, filtering, and quick access to trace details in a compact format.
List View Overview
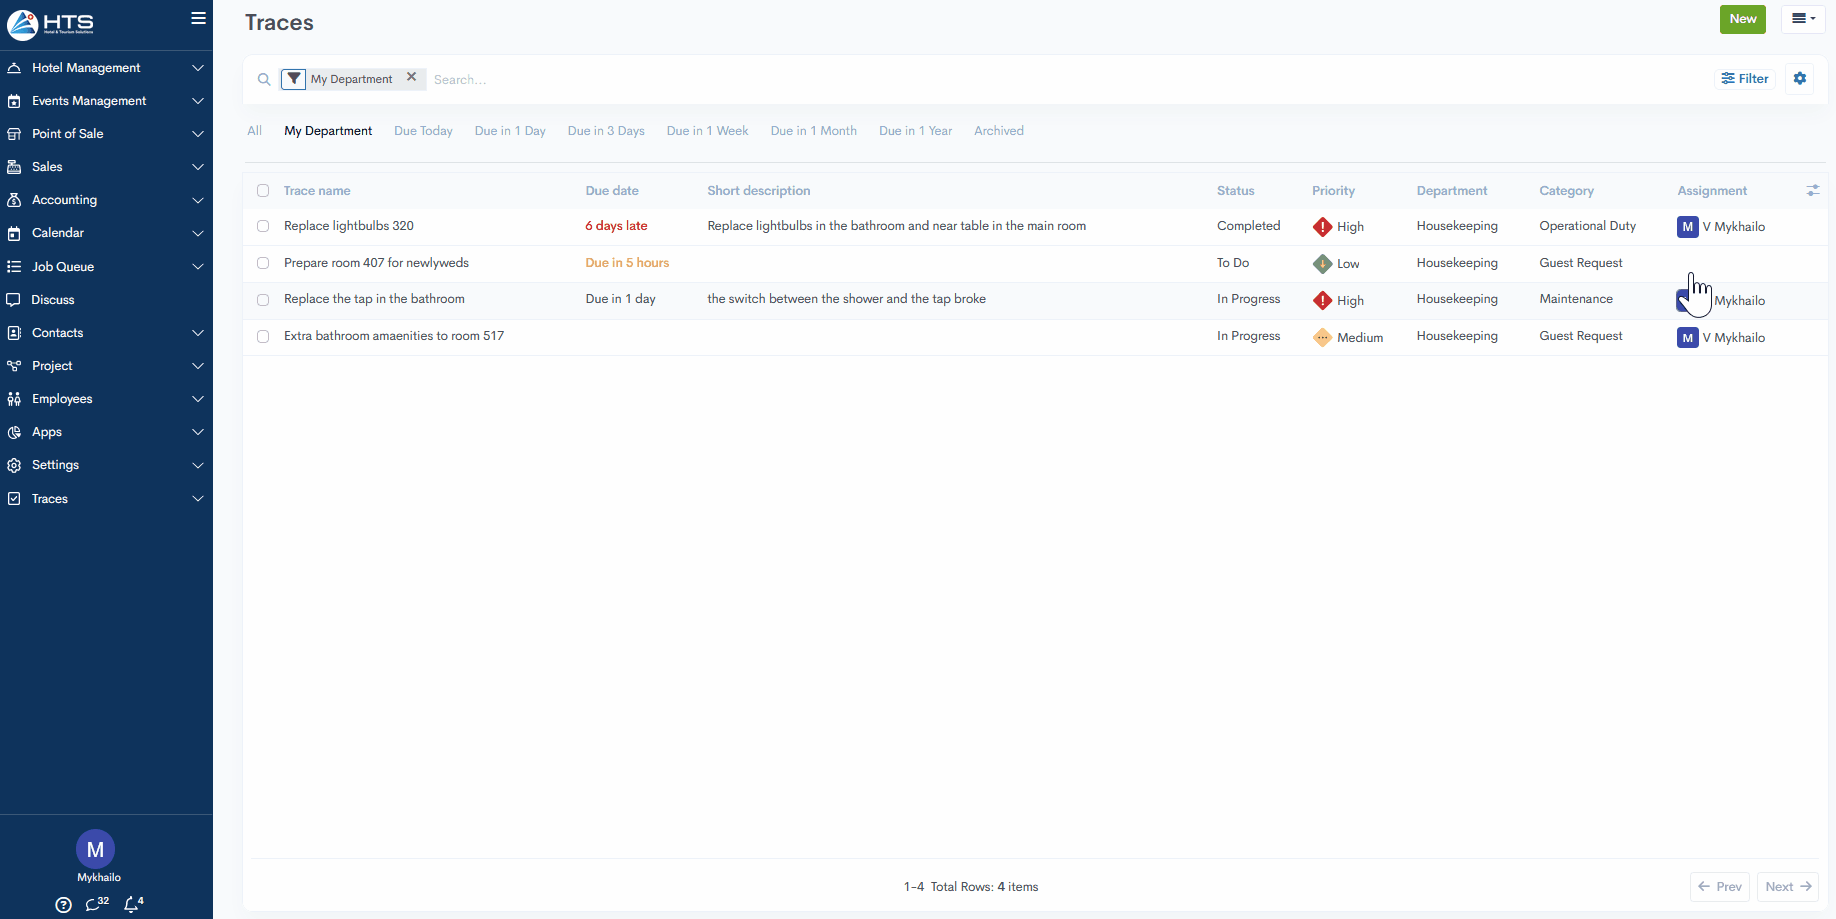
To access the Traces module, go to the sidebar menu and expand the Traces section. Then click on the “Traces” item in the sub-menu. This will open the module in the Kanban view by default. In the right corner, switch from the Kanban to the List option.
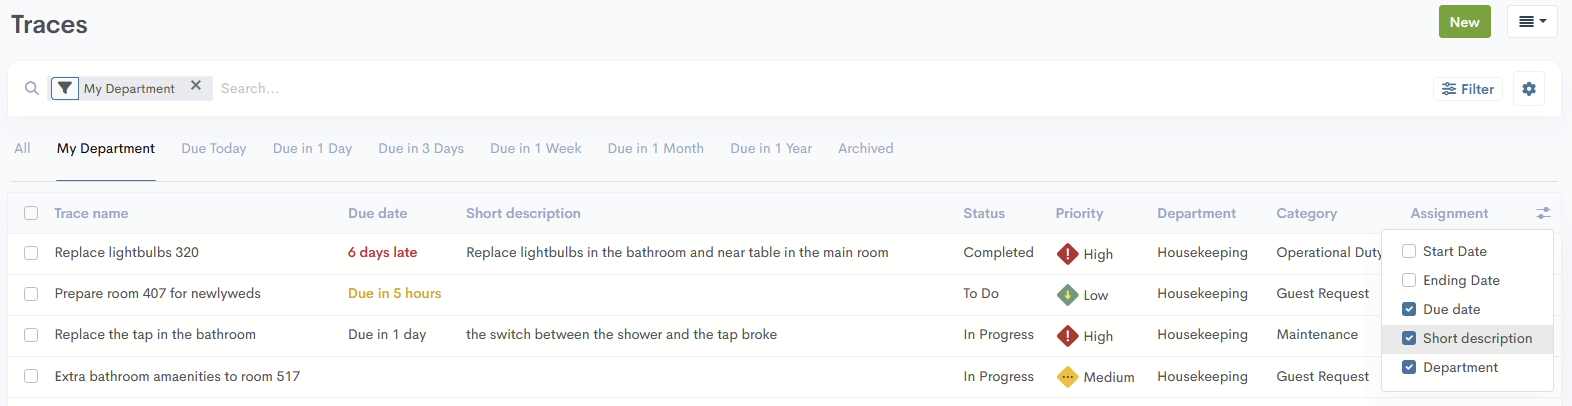
The List view displays Traces in a table format with the following columns:
- Trace name – the title of the trace
- Due date – the deadline for completing the trace
- Short description – a summary or note related to the trace
- Status – current status of the trace
- Priority – priority level (low, medium, high)
- Department – the department responsible for the trace
- Category – classification of the trace (e.g., Front Office, Maintenance)
- Assignment – shows the user assigned to the trace
Two additional columns – start date and ending date – may appear for recurring traces. These are optional and used only when recurrence is configured (see a separate article for details).
Above the table, a set of predefined filters is available to help users quickly narrow down the list of Traces. These include:
- All
- My Department (applied by default, showing only Traces assigned to the user's department)
- Due Date filters such as Today, 1 Day, 3 Days, etc.
- Archived Traces
These filters make it easier to focus on relevant or time-sensitive tasks.
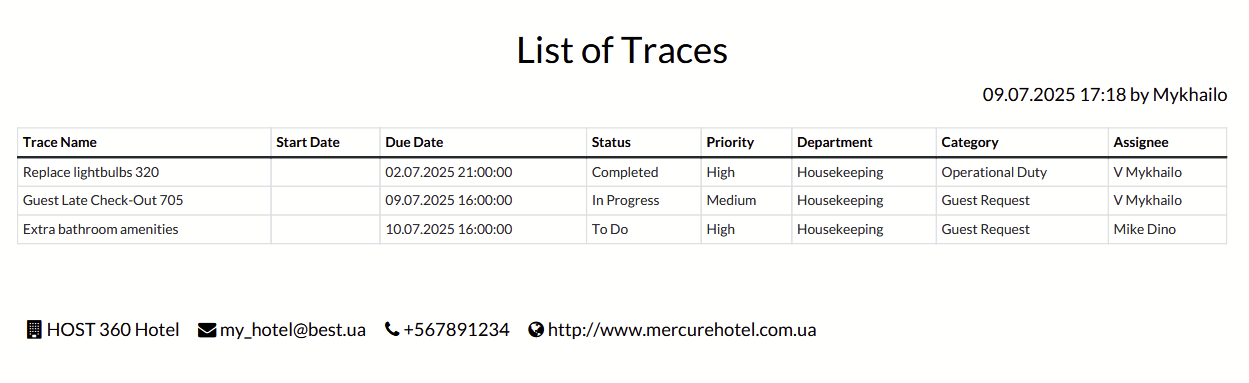
In the Traces List view, when multiple traces are selected, the system allows users to print a List of Traces. This printout includes the same columns as shown in the table (e.g., trace name, status, due date, etc.). Additionally, the list contains the date and time of printing at the top, as well as the hotel's contact information at the bottom of the page.
Create Trace via List
To create a new Trace in List view, click the New button located in the top right corner. After clicking, the system will open the trace creation form. Detailed information about the trace form is provided in this article.
There are no comments for now.
to be the first to leave a comment.