Traces: Trace Form
Unlike the compact Kanban card, the trace form contains all available fields and details related to the trace. It provides full visibility and control over the trace’s content, including assignment, priority, timing, linked documents, and attachments. Using the full form is essential for entering complete information, especially when creating complex or recurring traces, or when linking the trace to other records in the system.
Trace Form Layout
The trace creation form is divided into several sections:
- Trace Name – a title of the trace
-
Description – a text field below the title for adding more details or context

-
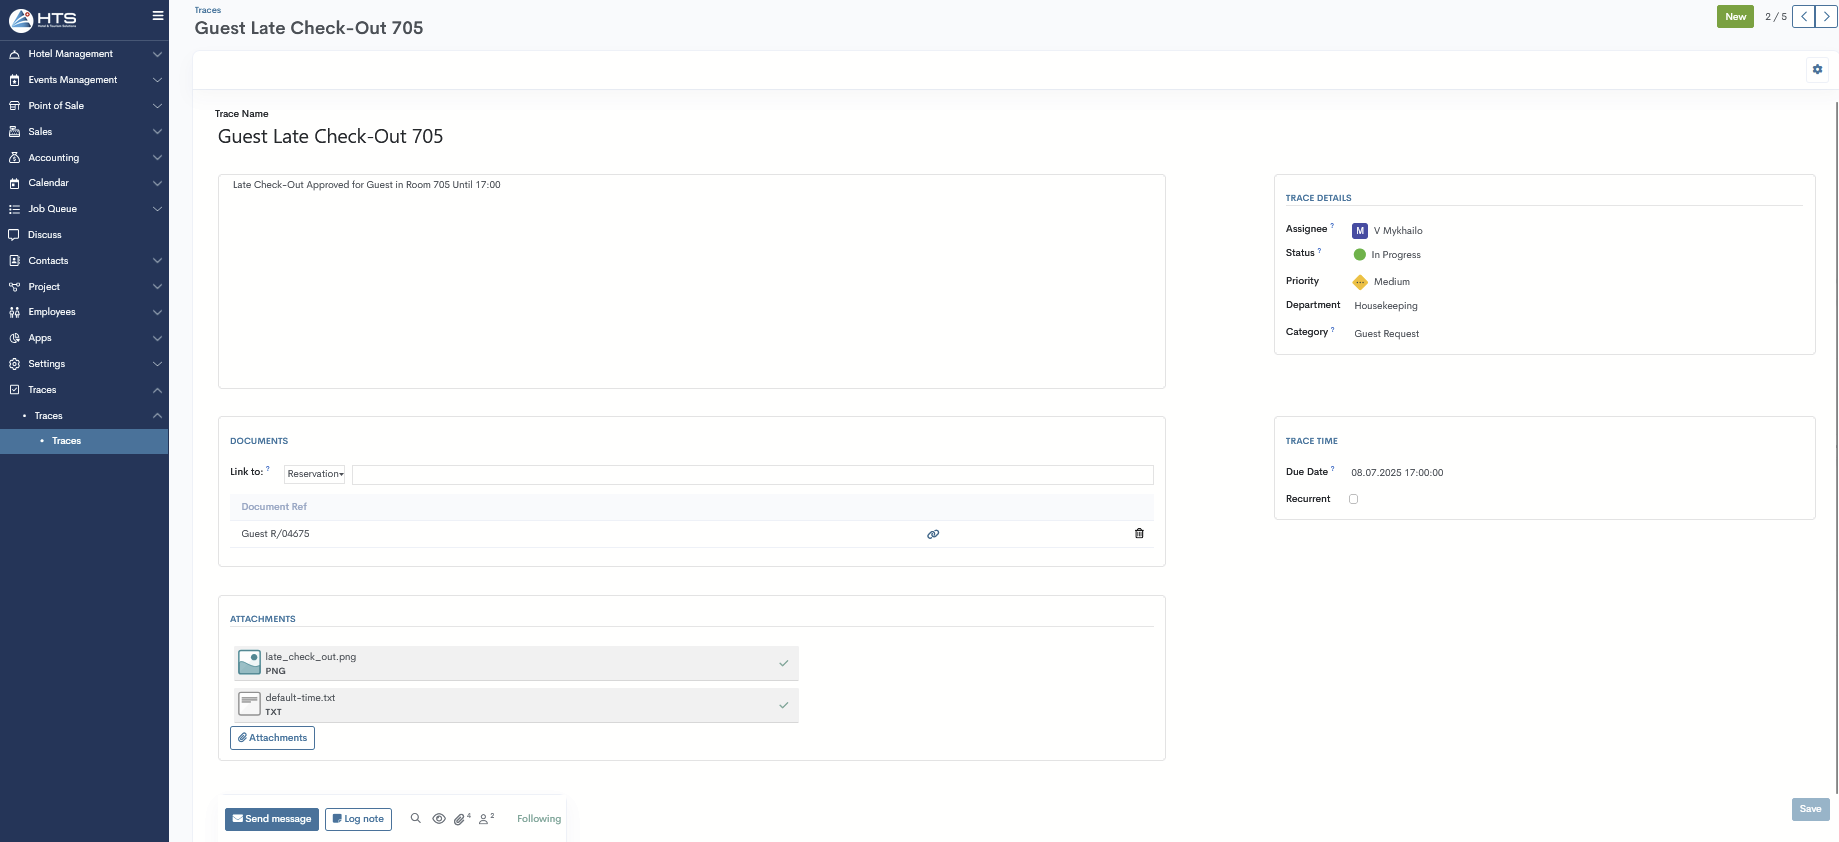
Trace Details – this section includes fields for assigning the trace, setting the status, priority, department, and category
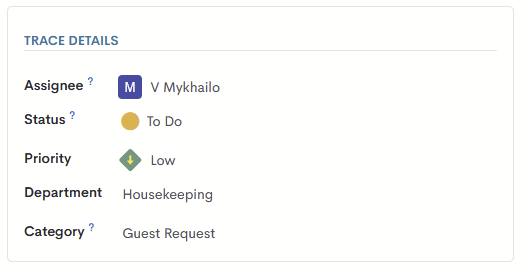
- Documents – allows linking the trace to a reservation, invoice, event, or contact. If a trace is linked to a specific entity in the system (such as a reservation, event, invoice, or contact), it will appear in a separate table below the Documents section. This table includes the following columns:
Document Ref – shows the reference number or name of the linked entity (e.g., reservation number, invoice number, contact name)
Link icon – allows users to quickly navigate to the related record
Trash icon – allows users to remove the linked document from the trace
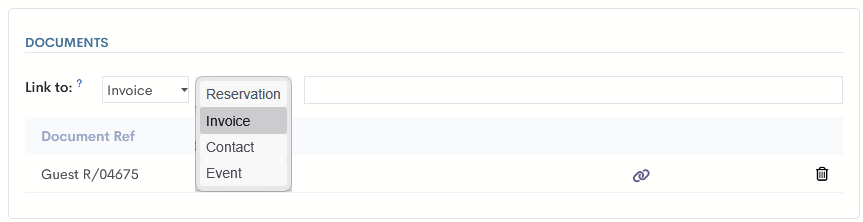
5. Trace Time – used to set the due date or configure the trace as recurring (Information about the Recurrent option will be provided in this article). 
6. Attachments – lets you upload files or images, with a maximum file size of 10MB. 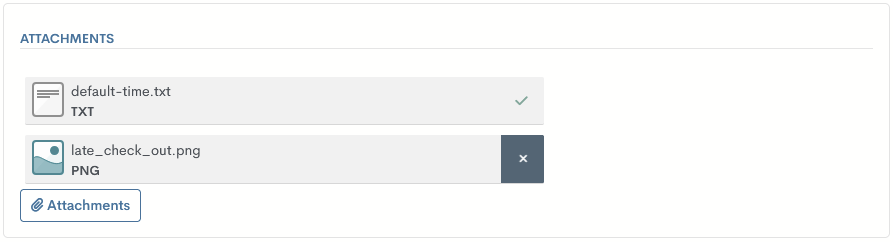
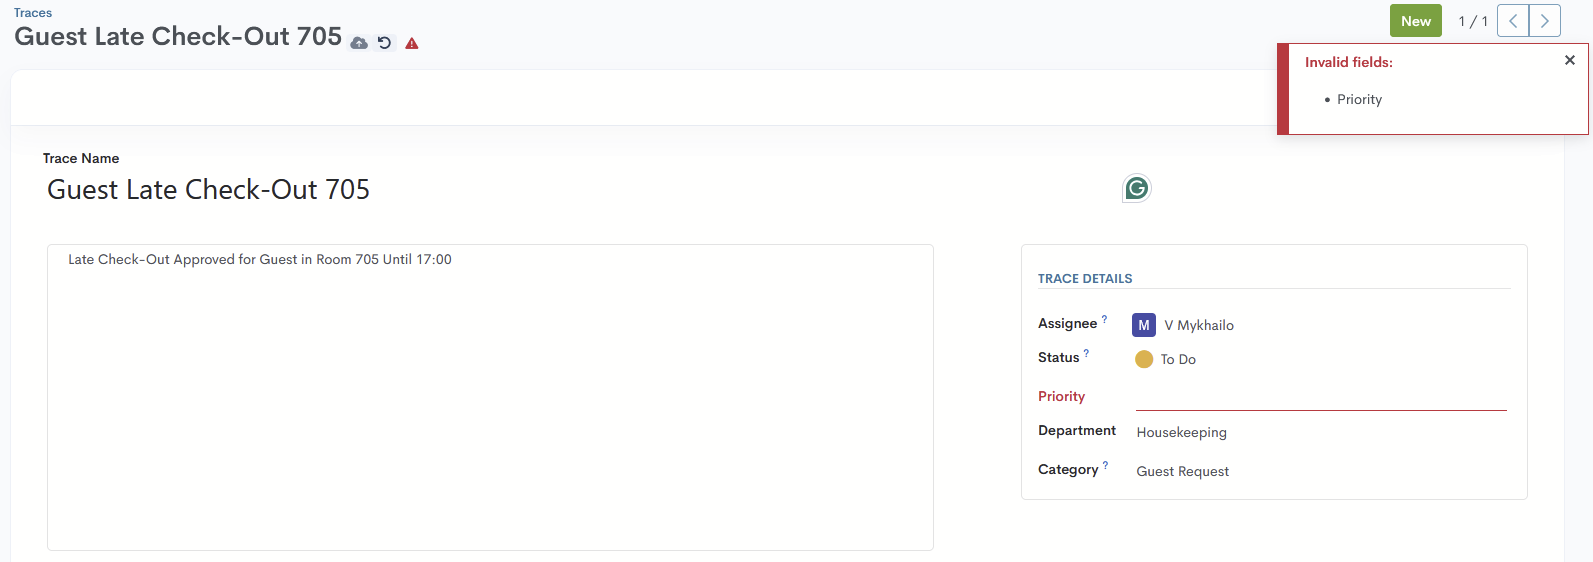
Four mandatory fields must be filled in before saving the trace: Trace Name, Priority, Department, and Category.
If any of these fields are left empty, the system will highlight them in red to indicate they require input.
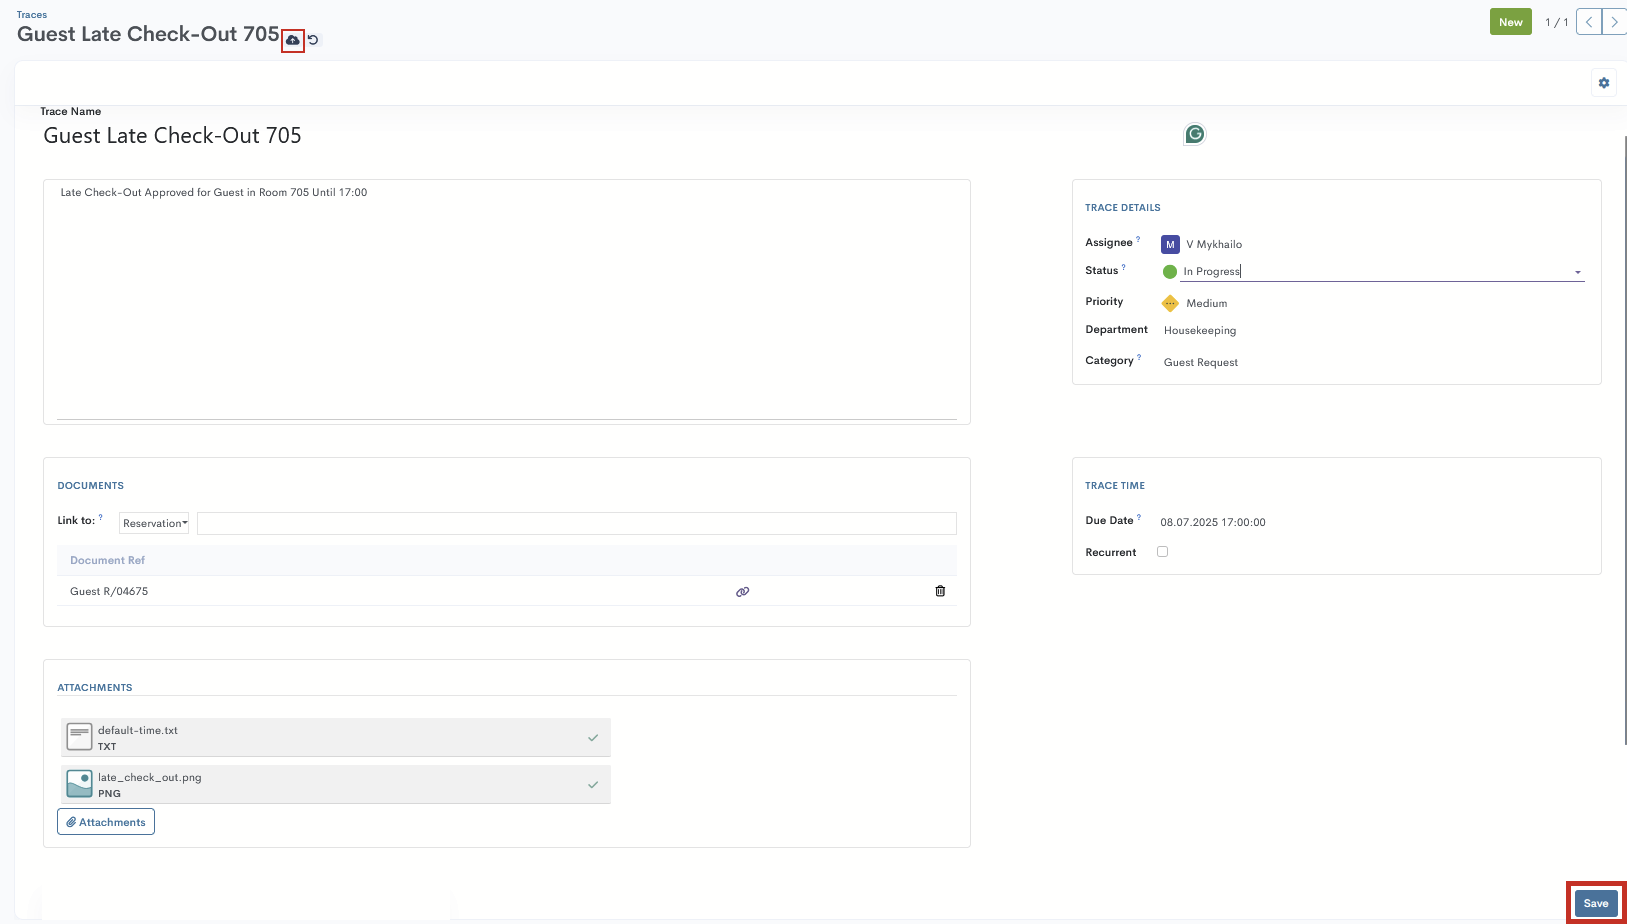
After all required fields have been filled in, you can save the trace by clicking the Save button in the bottom-right corner, or by using the cloud save icon in the top-left corner.
There are no comments for now.
to be the first to leave a comment.