In this article, we will show the layout of key elements on the room plan, along with a brief description of their functionality. Understanding the placement and purpose of these elements will help you navigate the interface more confidently and use the room plan efficiently in daily operations.
Room Plan Layout
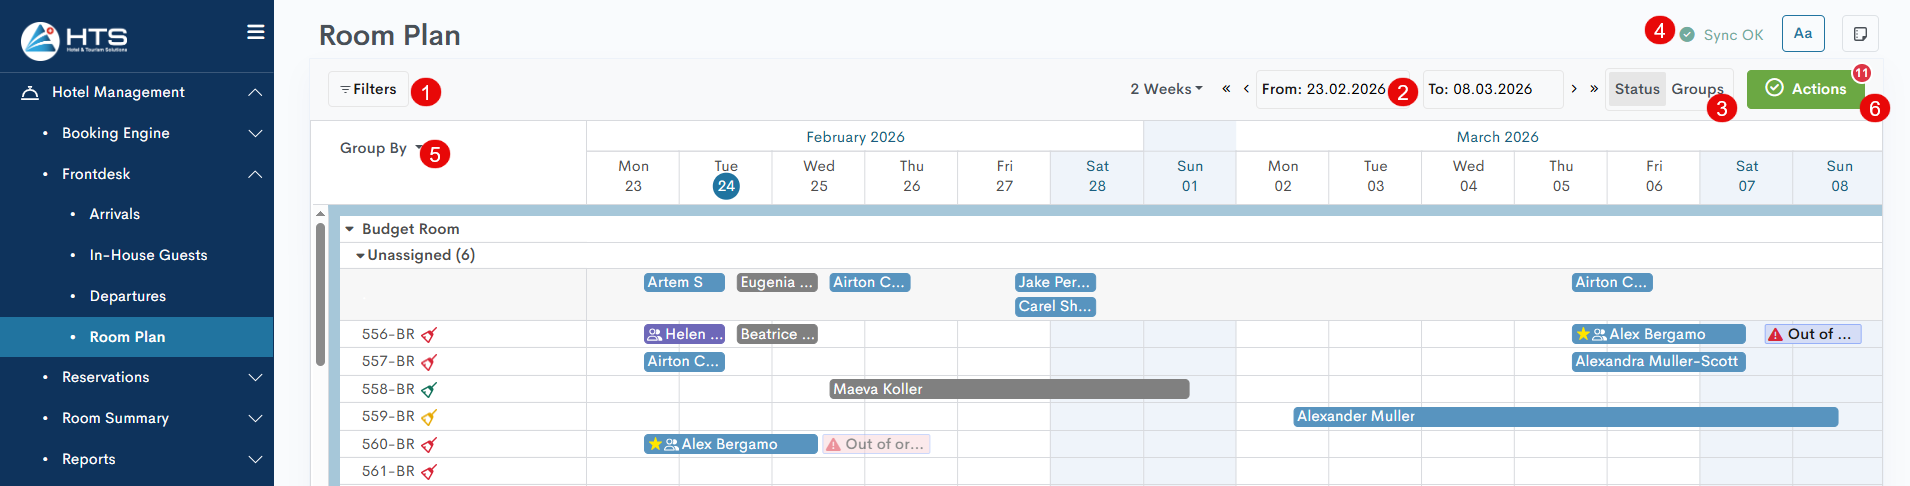
The navigation panel in the room plan includes the following fields and buttons:
- In the top-left corner of the room plan, you'll find the Filters button, which allows you to filter reservations by five main categories.
- To the right, there's the date period control panel, where the system offers several default ranges (3 days, week, 2 weeks, month, year, and custom), or you can manually enter the desired range using the From and To fields.
- Next to the date controls are the mode toggle buttons for switching between Status and Groups view modes.
- Above the mode selection, you’ll find several other tools:
- Sync status field (check for more details in the Live Updates article)
- Text size icon (switch between small, medium, or large text on the room plan)
- Room Plan Legend icon provides a complete explanation of all icons used in the reservation bars
5. Below the Filters button, there's the Group By button, which lets you group or sort rooms by surface, A→z, and other options.
6. Actions button highlights the reservations that are unassigned or have an overbooking conflict.
Bewertung
Momentan sind keine Kommentare vorhanden.
, um als erster einen Kommentar zu hinterlassen.